Showing posts with label dessert. Show all posts

Monday, March 5, 2012

Chocolate Cupcakes filled with Peanut Butter Chocolate Chip Cookie Dough and topped with Peanut Butter Frosting! Yum!

Last night, we all decided this is about the most amazing cupcake recipe ever!! I say "about" because we eat a lot of dessert at our house. It's truly gonna be difficult to ever declare something the "BEST EVER".

I had some peanut butter chocolate chip cookie dough in the freezer that someone had given me. So, that is where I started. I will not pretend to post a recipe for Peanut Butter Chocolate Chip cookie dough that is the same as what I used last night. I'll just say that ANY cookie dough is good! Even that refrigerated rolled up stuff. And, get creative with it! I had fun with the peanut butter theme.

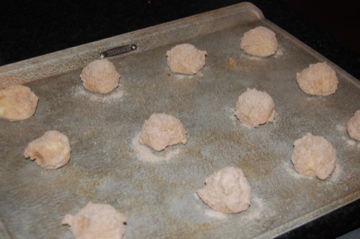
**Before you can do anything else, though, you need to make 24 tablespoon sized balls of cookie dough and freeze them for a couple of hours.

Besides that, for the cupcakes you will need:
1 cake mix (I used chocolate)
1/2 cup oil
1 1/3 cup water
3 eggs
Make according to box directions. In fact, if the box says 2 eggs and 2 cups of water, then go ahead and follow the box directions. There is certainly nothing magical about what I added to my cake mix!

Divide the batter into 24 paper lined cupcake tins. Place one frozen cookie dough ball in the middle of each tin. I pressed them in just a little, but it really wasn't necessary! The cupcake will "grow" around the cookie dough!
Bake this incredible yumminess at 350 for about 20 minutes. This pic is in the oven... Cool completely before frosting.
Since the dough was peanut butter based, I decided to make a Peanut Butter Frosting - which by the way was a great idea!!

Peanut Butter Frosting
1 cup peanut butter
1/2 cup butter
3 1/2 cups powdered sugar
1/3 cup cream or milk
First, cream the peanut butter and butter til smooth. Add about half of the powdered sugar and cream, then mix until smooth. Finish with the remaining amounts. You may have to adjust and add a little more milk or powdered sugar until it is the consistency you like....and soft enough to be spreadable.

I like piping the frosting on, because it looks like it came from a bakery! Obviously my decorating skills aren't all that fantastic, but I think these look much better than cupcakes that have frosting spread to the edges with a butter knife! This one is cut in half, so maybe it isn't as pretty now, but I wanted you to see the cookie dough in the middle! Yum!
Enjoy!!

Thursday, September 1, 2011

Granny's Disappearing Chocolate Cake

Our Grandma was a fabulous cook! As she got older, we tried to get her to write down as many recipes as possible so they wouldn't be lost forever. This cake was always a family favorite, so of course, we got the recipe. It's been over 10 years since Grandma passed away, but I still think of her every time I make the cake.

The problem was that she wrote it down wrong (but I didn't know that until last month)!!! So every time I made it, I wondered why I had such differing results. Sometimes it seemed to work out ok, but other times, it would just fall in the middle. Finally, I decided to do some research and see what I could find. Because Grandma always called it "Hershey's Disappearing Cake", I was able to find the original recipe on the internet, along with the following note, "We found this recipe in a magazine at a doctor's office where my wife discovered she was pregnant over 19 years ago. It has become our favorite recipe." Finally, I was able to see where Grandma had copied the recipe wrong. She had written 1 1/4 cups of flour, instead of 1 3/4 cups! Now, it is truly our favorite recipe, since we can make it without fail - literally!

1/4 cup butter
1/4 cup shortening
2 cups sugar
1 tsp vanilla
2 eggs
3/4 cup cocoa
1 3/4 cup flour
3/4 tsp baking powder
3/4 tsp baking soda
1/8 tsp salt
1 3/4 cup milk

Grease a 9x13 pan. Cream butter and shortening, then add sugar and vanilla until fluffy. Blend in eggs. Combine cocoa, flour, baking powder and soda, and salt in a bowl. Add milk and flour mixture alternately to batter. Blend well and pour into prepared pan. Bake at 350 for 30-35 minutes, or until cake bounces back when touched. Cool for 10 minutes, then spread the warm chocolate frosting (recipe below) on the cake.

Granny's Chocolate Frosting
1 cup semi sweet chocolate chips
3 TB butter
1/4 cup water
1 tsp vanilla
2 1/2 cups powdered sugar

Mix first 4 ingredients in saucepan over low heat, stirring occassionally until smooth. Add powdered sugar and beat until smooth. (at this point, sometimes I transfer the frosting to my Kitchen Aid for mixing, so that the frosting will be really smooth and creamy, or you could just use a hand mixer in the saucepan).

Tips: You want this frosting to be a little "runny" when you spread it on the cake. As it cools, it will harden - sometimes to the point of fudge! So, I often add a tablespoon of milk before spreading it on the cake. That keeps the frosting a little softer after cooling. Either way, it is delicious!!

Thursday, August 25, 2011

S'more Cookie Bars!


I came across these on lovinintheoven.com and had to try.. they are even better than they look!!

S'More Cookie Bars
Ingredients:
  • 1/2 cup butter, room temperature
  • 1/4 cup brown sugar
  • 1/2 cup sugar
  • 1 large egg
  • 1 tsp vanilla extract
  • 1 1/3 cups all purpose flour
  • 3/4 cup graham cracker crumbs
  • 1 tsp baking powder
  • 1/4 tsp salt
  • 2 king-sized milk chocolate bars (e.g. Hershey’s)
  • 1 1/2 cups marshmallow creme/fluff (not melted marshmallows)
Directions:
  1. Preheat oven to 350°F. Grease an 8-inch square baking pan.
  2. In a large bowl, cream together butter and sugar until light. Beat in egg and vanilla. In a small bowl, whisk together flour, graham cracker crumbs, baking powder and salt. Add to butter mixture and mix at a low speed until combined.
  3. Divide dough in half and press half of dough into an even layer on the bottom of the prepared pan. Place chocolate bars over dough. 2 king-sized Hershey’s bars should fit perfectly side by side, but break the chocolate (if necessary) to get it to fit in a single layer no more than 1/4 inch thick. Spread chocolate with marshmallow creme or fluff. Place remaining dough in a single layer on top of the fluff (most easily achieved by flattening the dough into small shingles and laying them together).
  4. Bake for 30 to 35 minutes, until lightly browned. Cool completely before cutting into bars.

Makes 16 cookie bars.

Monday, May 30, 2011

Cupcake Obsession!!

My kids say that I am obsessed with cupcakes!!  Well, I say why the heck not!  I thought I would post some pictures with ideas so you can either try these or take some of my ideas and expand on them!  Would love to see some of them if you come up with some new varieties!

I have to say that after trying several home made recipes for cupcakes, I have decided unless it is a crazy flavor that I can't buy in a box, I am sticking to the box! They are so much lighter and fluffier and most people who try both prefer the box mixes!

I have found that if I use a simple buttercream recipe, I can add just about anything to it and it tastes great!

Buttercream Icing:
1 stick butter
1 tsp. vanilla
3 C Powdered sugar
milk

Cream first 3 items together in mixer and add milk as needed for the proper consistency.

Chocolate Buttercream- add 1/2 cup unsweetened cocoa to above recipe.

The easiest way that I have found to ice cupcakes is to get some disposable cake decorating bags.  They are just a heavy triangle shaped bag.  I roll the top over and fill up the bag.  Cut about 1/2 inch off the tip and pipe the icing on!  It is that easy and no messy tips or bags to clean.  Just throw away the bag! If you want it to look a little more formal, you can use a decorative tip in the bag.

Now that you have the two basics- you get to get creative!

This assortment has my chocolate peanut butter cupcakes, rocky road, and strawberry vanilla bean.


For the Chocolate Peanut Butter cupcakes, I add about 3 TBSP cream peanut butter to the buttercream icing.  Top with chopped Reeses Peanut Butter cups and enjoy!  You can also drizzle melted peanut butter or melted peanut butter chips for a more elegant look.

The Rocky Road cupcakes just have the chocolate buttercream with marshmallows and chopped nuts (I prefer pecans or almonds).

The strawberry vanilla bean is a vanilla cupcake that I scraped some vanilla beans into.  Do the same with the vanilla buttercream and top with fresh strawberries.


Sometimes I am looking for stuff to use up in my pantry.. as is the case with the above cupcake.  We took some Girl Scout Samoas along with some toasted coconut and topped the chocolate/chocolate cupcakes!  YUM!


 Last but certainly not least are my personal favs!!  Triple Salted Caramel Cupcakes!  Even the name sounds divine!
These started out with a vanilla cupcake or I have seen recipes for caramel cupcakes online..  Topped with a caramel sauce that I made- I will find and post the recipe if anybody is interested.. it was a caramel candy recipe that I just didn't thicken all of the way.  I put that into a squirt bottle and pushed the tip into the cupcake and filled.  I then topped with the above buttercream icing that I added some of the caramel to.  I also added a tsp. of sea salt.  I then drizzled the tops with more caramel and a light shake of sea salt.  My daughter got creative and talked me into making the sugar scuptures on top!  They didn't taste as good as they look, so probably a bit more trouble than they are worth!  This cupcake is to die for!


Wednesday, May 18, 2011

Snickerdoodles

These snickerdoodles are absolutely the best ones you will ever eat!  I would recommend doubling the recipe~ they are going to go fast...


1/2 C butter, softened
1/2 C shortening
1 1/2 C white sugar
2 eggs
2 tsp. vanilla
2 3/4 C flour
2 tsp. cream of tartar
1 tsp. baking soda
1/4 tsp. salt


cinnamon 
sugar


Preheat oven to 400 degrees.  Cream butter, shortening, sugar, eggs and vanilla.  Blend in the dry ingredients.


I just have to throw in here that I don't know how I have lived my entire life thus far without this spatula beater for my Kitchenaid!!  I found it at a kitchen store in an outlet mall but have seen them other places- it is an absolute must-have if you own a Kitchenaid.. now back to the recipe! :)


Shape dough into rounded balls (I use a cookie scoop so it is really quick..)  Roll in cinnamon sugar mixture.  Place about 2 inches apart on cookie sheet.


Bake for 8 to 10 minutes or until set.  Remove from cookie sheets immediately or they will start to stick!


Enjoy~ 

Monday, May 16, 2011

Brownie Trifle

Last weekend, I offered to make brownies for a party. Once the brownies were baked, I decided to get a little more creative! One of my favorite things to do with brownies is make them into a trifle. The best thing about trifle is that there are NO RULES! Anything yummy and sweet will probably work! Below is my "basic" recipe, but have fun making it your own.

1 21 oz. brownie mix, prepared
4 oz. cream cheese
1 cup marshmallow cream
8oz container frozen whipped topping
1 1/2 cups milk
3 oz pkg instant pudding mix (any flavor)
1/2 jar caramel topping

Layer #1 - Start by baking the pan of brownies - any flavor will work, but of course, my favorites are the Sisters' Gourmet Chocolate Overload Brownies. Then, crumble them and put about a third in the bottom of a trifle dish or a 9x13 pan or whatever you want to useFor layer #2 - Beat cream cheese, then add marshmallow cream until blended. Stir in 1/2 of the whipped topping. Spread over the crumbled brownies.

Layer #3 - Pour caramel topping evenly over the creamy layer.

Layer #4 - Combine pudding mix and milk until thickened. Stir remaining whipped topping into pudding. Spread about 1/2 of this over the caramel.

Layer #5 - Crumble about 1/3 of the brownie pieces over the pudding layer.

Layer #6 - Spread the rest of the pudding over the brownies.

Layer #7 - Sprinkle the rest of the brownie pieces on top.

Layer #8 - If I have extra whipped topping, I sometimes put a little more on the top. I've also finished it off with chocolate shavings.

It can be served right away, or refrigerated for a few hours. I love it the most on the second day, but it doesn't look as pretty. This will serve about 12 -15! Enjoy!